
The Four-Level Hierarchy helps organise learners within your organisation and determines who they can see and interact with across the platform. Every learner belongs to a single Team, with each Team associated with a Division, Region, and Branch.
The hierarchy plays an important role in controlling visibility throughout the LMS, including social feeds, leaderboards, user profiles, manager reporting, and content invitations. Each hierarchy level can also be renamed to match your organisation's structure, making it flexible enough to support a wide range of business models.
Managing the Hierarchy
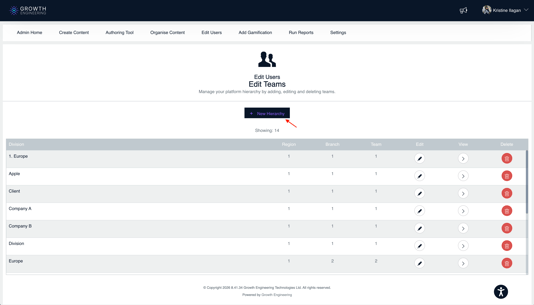
1. On the Admin Dashboard, go to Edit Users > Edit Teams.
2. To create a new hierarchy, click on the New Hierarchy button.
3. Select an existing Division, Region, or Branch from the dropdown menus on the left. If the required hierarchy level does not exist, create a new one using the fields on the right.
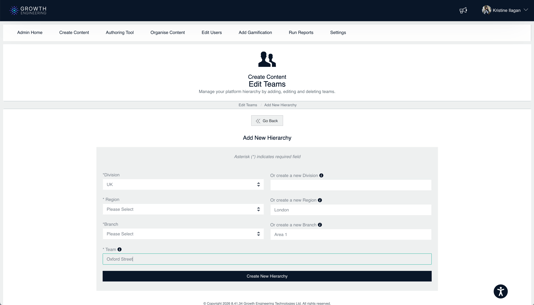
4. Click on the Create New Hierarchy button to save changes.
5. You can add new Regions, Branches, and Teams by repeating Steps 1–4. Alternatively, navigate to the parent hierarchy using the View (>) icon, click New Region, New Branch, or New Team, and then complete Steps 3–4.
Click the Edit icon to rename a hierarchy level, or click the Delete icon to remove it.
Keeping Your Hierarchy Up to Date
Your Four-Level Hierarchy is now configured and ready to use. A well-structured hierarchy helps ensure learners, managers, and administrators have the appropriate visibility across the platform, while supporting reporting, social features, leaderboards, and content management.
As your organisation evolves, you can update your hierarchy and rename levels to reflect changes to your organisational structure.