
Materials provide a simple way to share supporting resources and learning content with learners, such as documents, guides, reference materials, and other useful resources. Admins can create and organise Materials within the LMS, making them easy for learners to access alongside their other learning content.
📁 Working with Materials
1. Go to Admin Dashboard > Content > Material.
2. Select an existing Section, or click New Section to create a new one.
📌 Materials are organised into Sections. This provides a structured way for admins to manage and organise content.
3. Inside the Section, you can view all existing Materials, including details such as the number of files uploaded and their current status. Click Create to add a new Material.
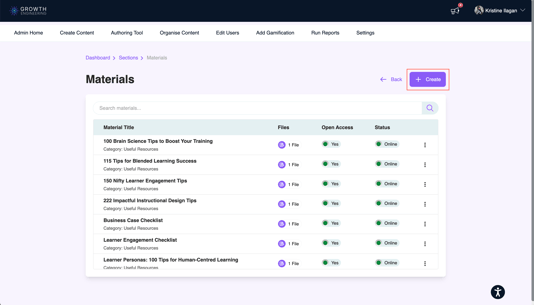
🗒️ Click the More Actions icon (three vertical dots) to Edit or Delete a Material.
4. In the Form, complete the required fields and enter the relevant details for the Material.
5. At the bottom of the Form, upload up to three files to include with the Material. Each file can be up to 150 MB.
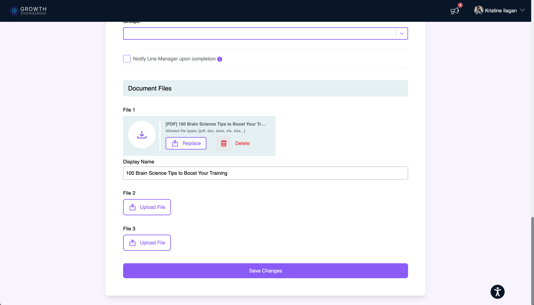
Supported file types include:
- Word documents
- PowerPoint presentations
- Excel spreadsheets
- Audio clips (MP3)
6. Click Save Changes button.
💡 Tip: Make sure the Material status is set to Online if you want it to be available to learners.
👀 Learner View
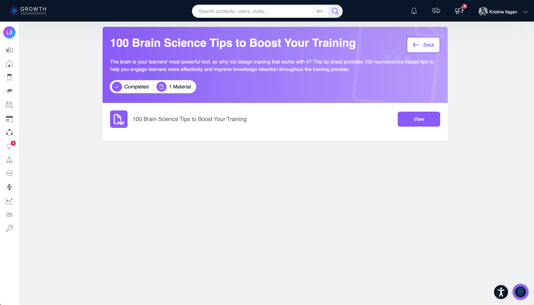
When learners access a Material, they can view the Material title and description, along with the files attached to it. This provides learners with the information they need and gives them direct access to the supporting resources included in the Material.
✅ Materials Ready
Your Material is now set up and ready for learners to access through the Learning Library, provided its status is set to Online.
You can return to the Material at any time to update its details, replace or add files, or manage its status.