You can create and edit the content groups under the admin panel under Curricula - Group Manager.
Step 1
Create a Content Group via Admin - “Manage Group Content” area. Here you can see your existing groups and create new ones. You can also see the types of content linked to that group.

Click on the + New Group:
Define the name for the group and assign the status as ‘online’. We will discuss the ''Supergroups” in another article, thus leave that blank for now.
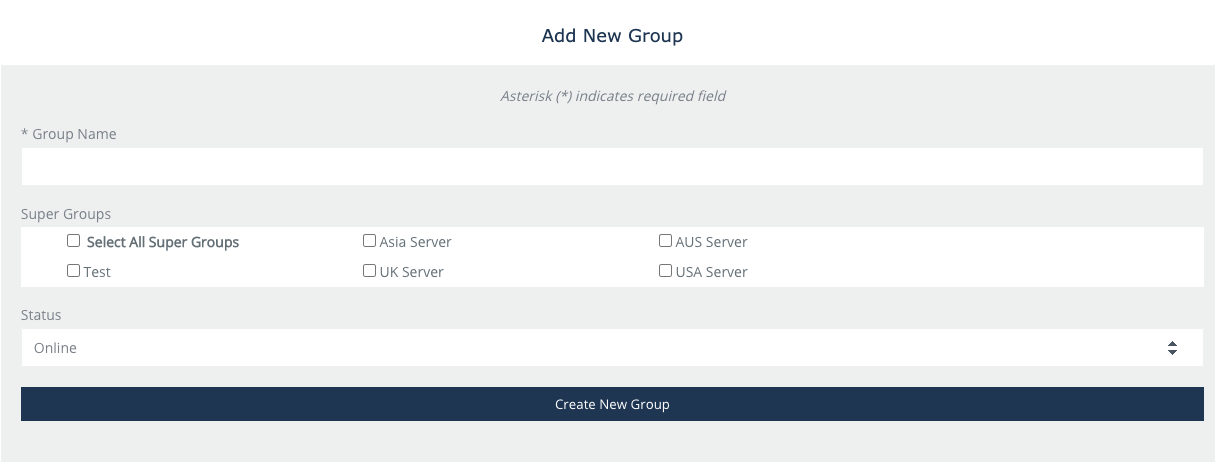
Click ‘Creat New Group'.
Step 2
After you have created the new Content Group, click on the Edit button and then click the “Edit Users” button to access this area.

When you click on the Edit Users button, you can add filters to the hierarchy and access levels so it will be easier to find the learners you need to add to the new Content Group.

For example, in the image below, we have selected the CS team but only the users with a Manager access level. This way, we can add Managers from this team into the Content Group created.

Step 3
Once you have drilled down, you can continue to add users from other hierarchies or with other access levels but always remember to save changes after you move learners in the right-hand side column.
You have now successfully added created a content group and added users to this content group.