Mistakes happen, it’s a part of life!
As a platform administrator, inviting users to content it’s a task that sometimes requires lots of attention. But potentially some gremlins creep up resulting in sending invites to the wrong content or to the wrong audience.
So here is your failsafe - follow these steps to delete content invites when needed.
Where to find the functionality?
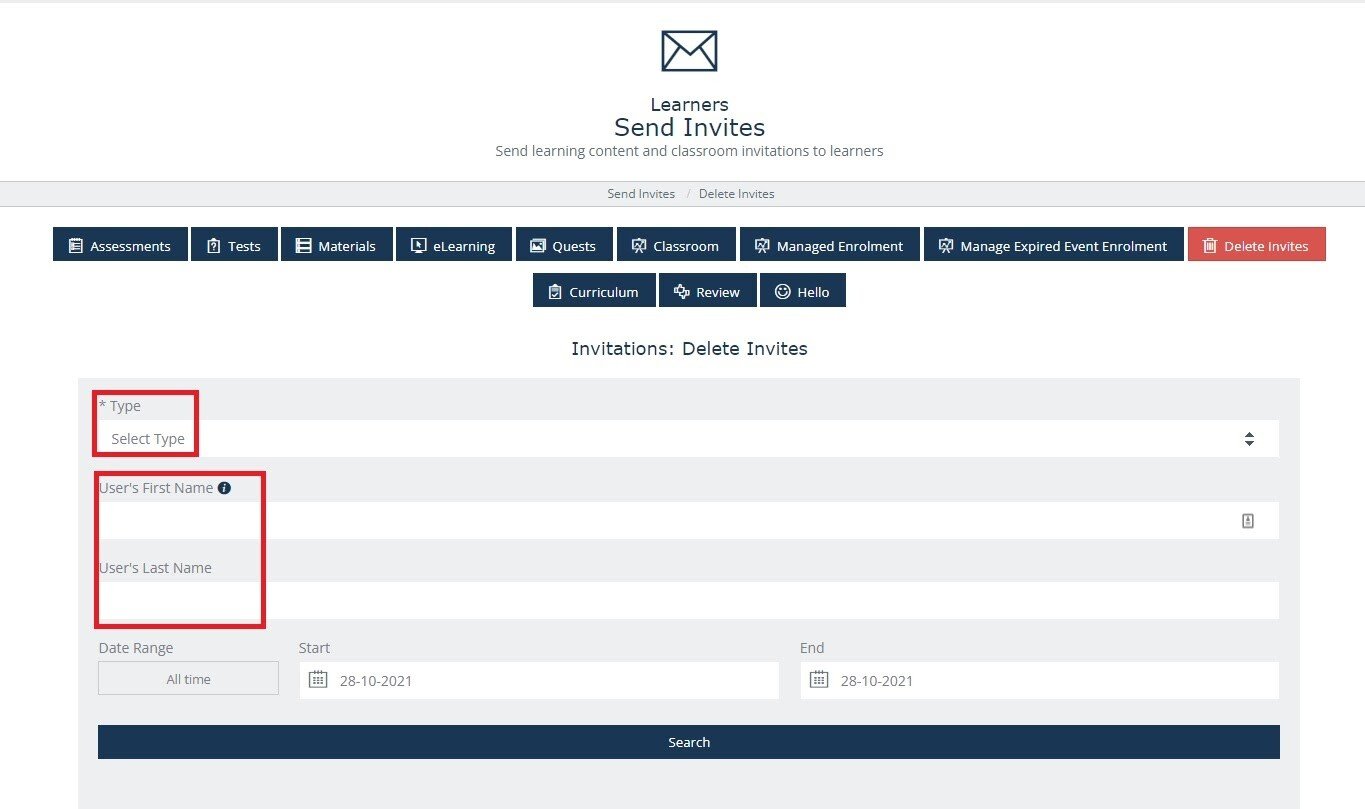
This functionality is on the Admin Dashboard>Send Invites. There is a ‘Delete Invites’ button, highlighted in red, this is the one you are looking for!

Search for invites to content
In order to search for the invites, follow the steps below by selecting the content type and the name or surname of the user.
If you wish to see all invitations sent for that content type, you can ignore the name of the user.
Note: if looking for invitations sent to a certain user, keep the search criteria simple and enter only the user's surname.
The next field, ‘Date Range’ must be selected too. Depending on the information you have, you can select the ‘All time’ option. This will result in a list with all the invites sent to the user for the content type selected.
Example:
The Admin has sent a wrong eLearning invite to user G.E.O. Bot.
The Admin does not know when the invitation was sent or just wants to check how a piece of eLearning ended up in G.E.O.’s My Things To Do section.
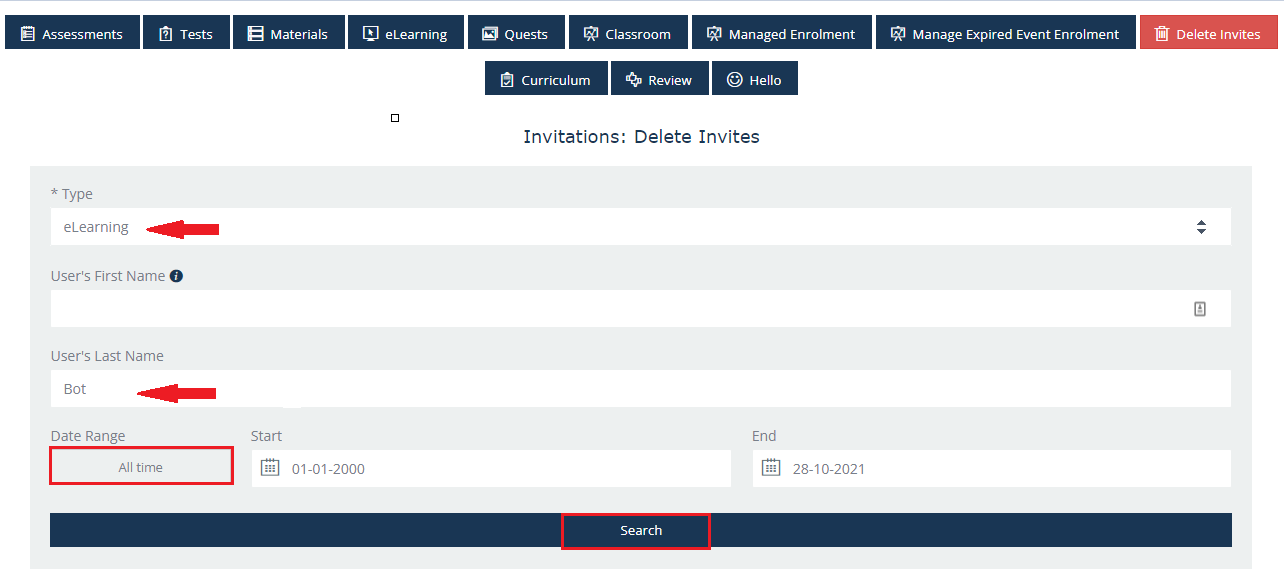
Step 1: The Admin will select the content type, in this case, eLearning
Step 2: Enter the surname (Bot)
Step 3: Click on ‘All time’ option (‘Start date’ will automatically set to 01.01.2000)
Step 4: Click on the ‘Search’ button
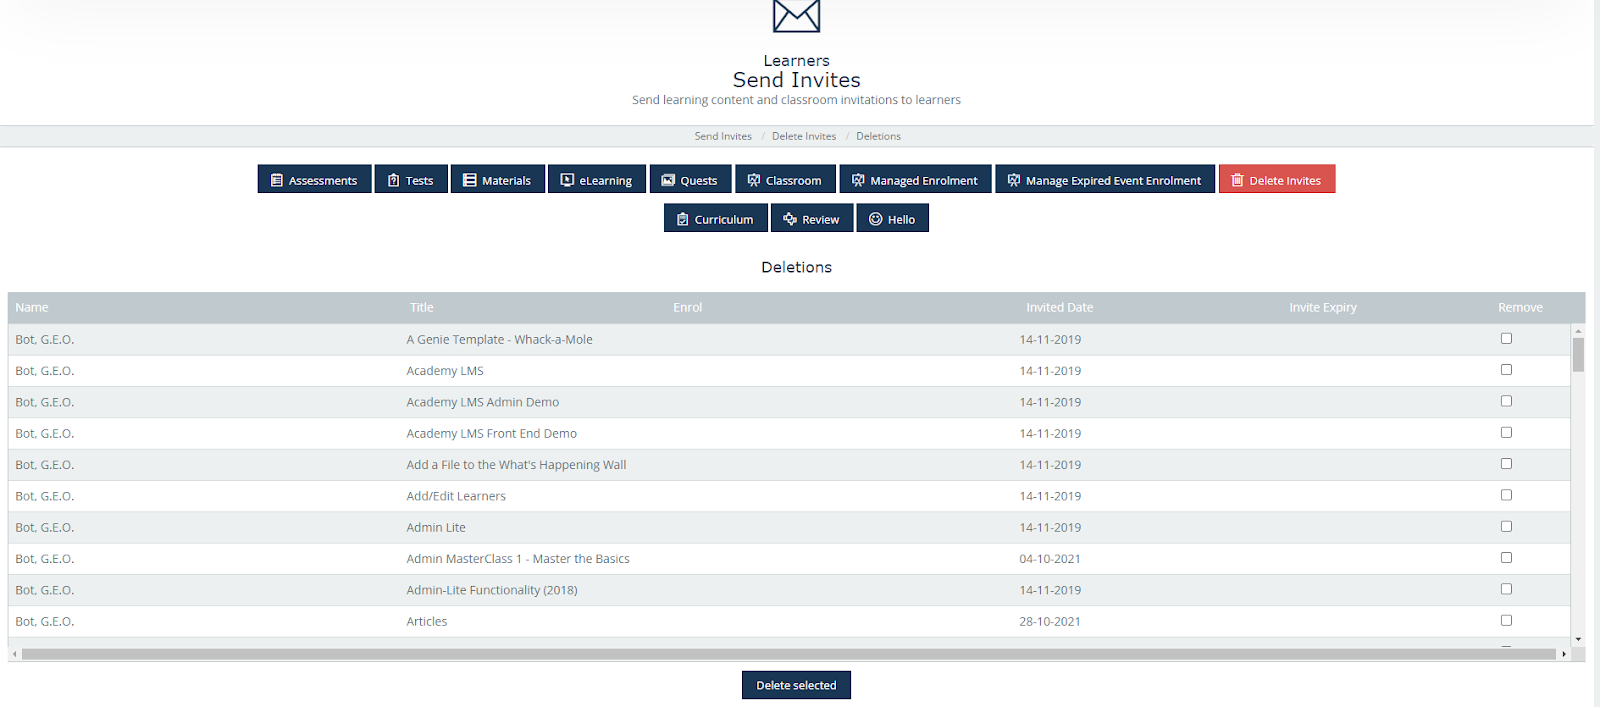
Step 5: The list will all eLearning invitations sent to user G.E.O. Bot will appear.
Delete the invitations to content
By now, you’ll have on the screen a list with invites to content.
Starting from left to right, there are six columns, name of the user, content title, enrol(not in use), invited date, invite expiry date (if set) and remove.
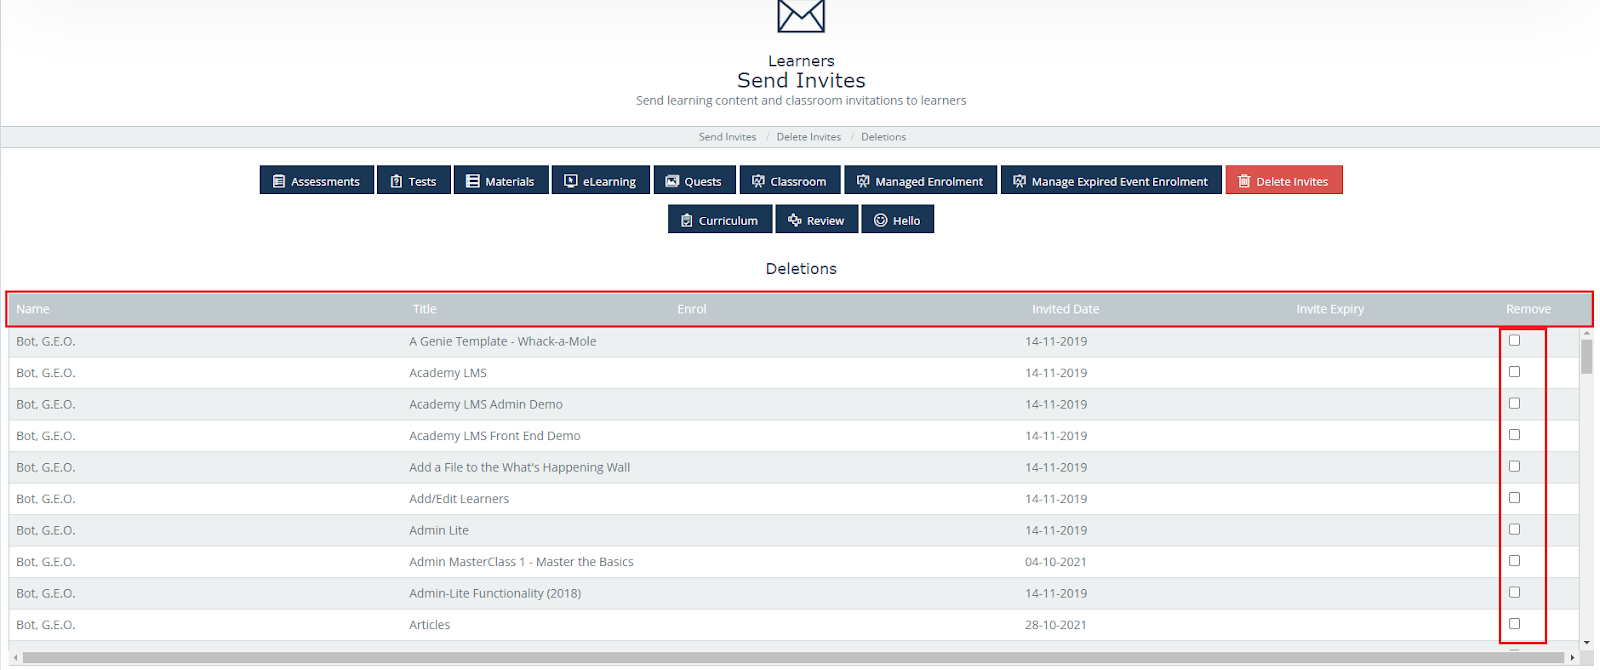
From this list, you would select the invitation you wish to delete by clicking on the checkbox from the ‘Remove’ column.
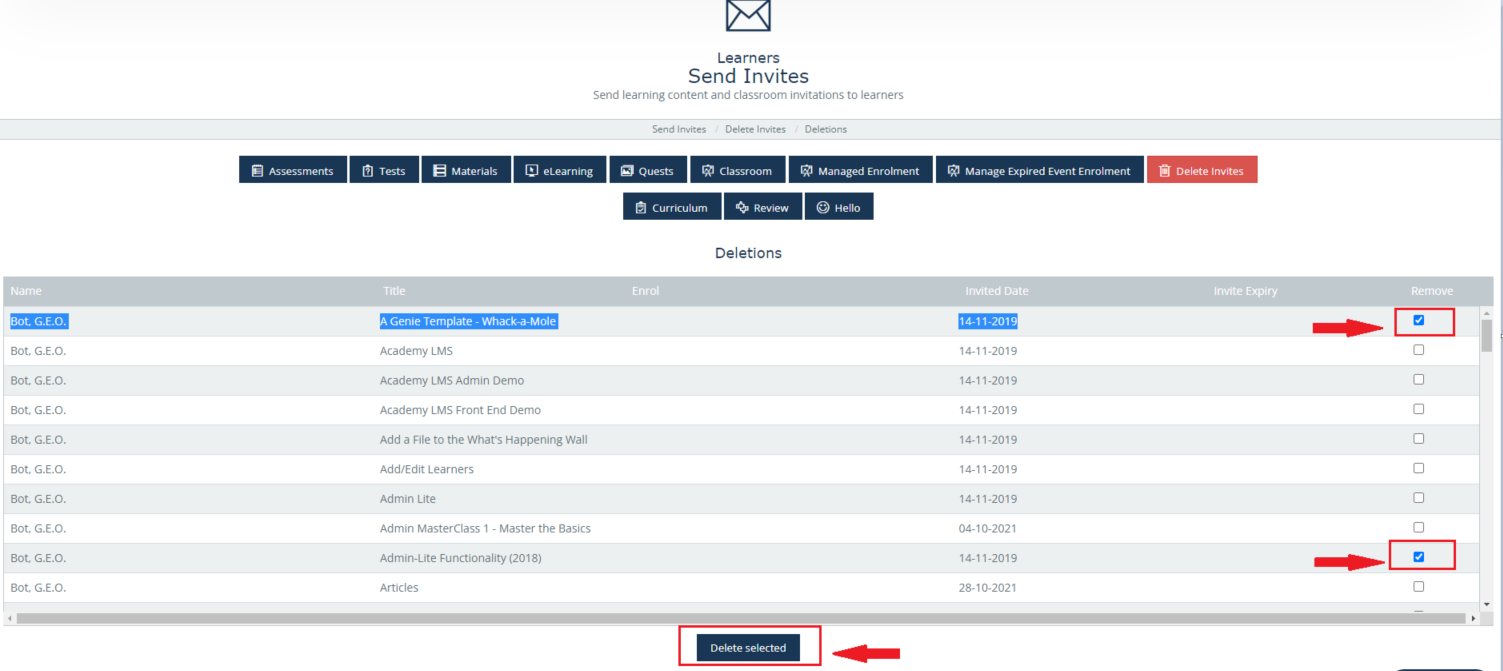
To finish and remove the invitations, click on the ‘Delete selected’ button.
Deleting the invitations will remove the titles from the user's MTTD section.
Voila!
Note: that if the user accessed the content, this will remain visible in the user's Library and in the My Learning section.