What are “invites”?
Invitations are available on the Academy LMS to directly send training content to Learners, for which they will receive an email notification. The invited content will appear in their My Things To Do, and will remain there until completed (or the expiry date is reached).
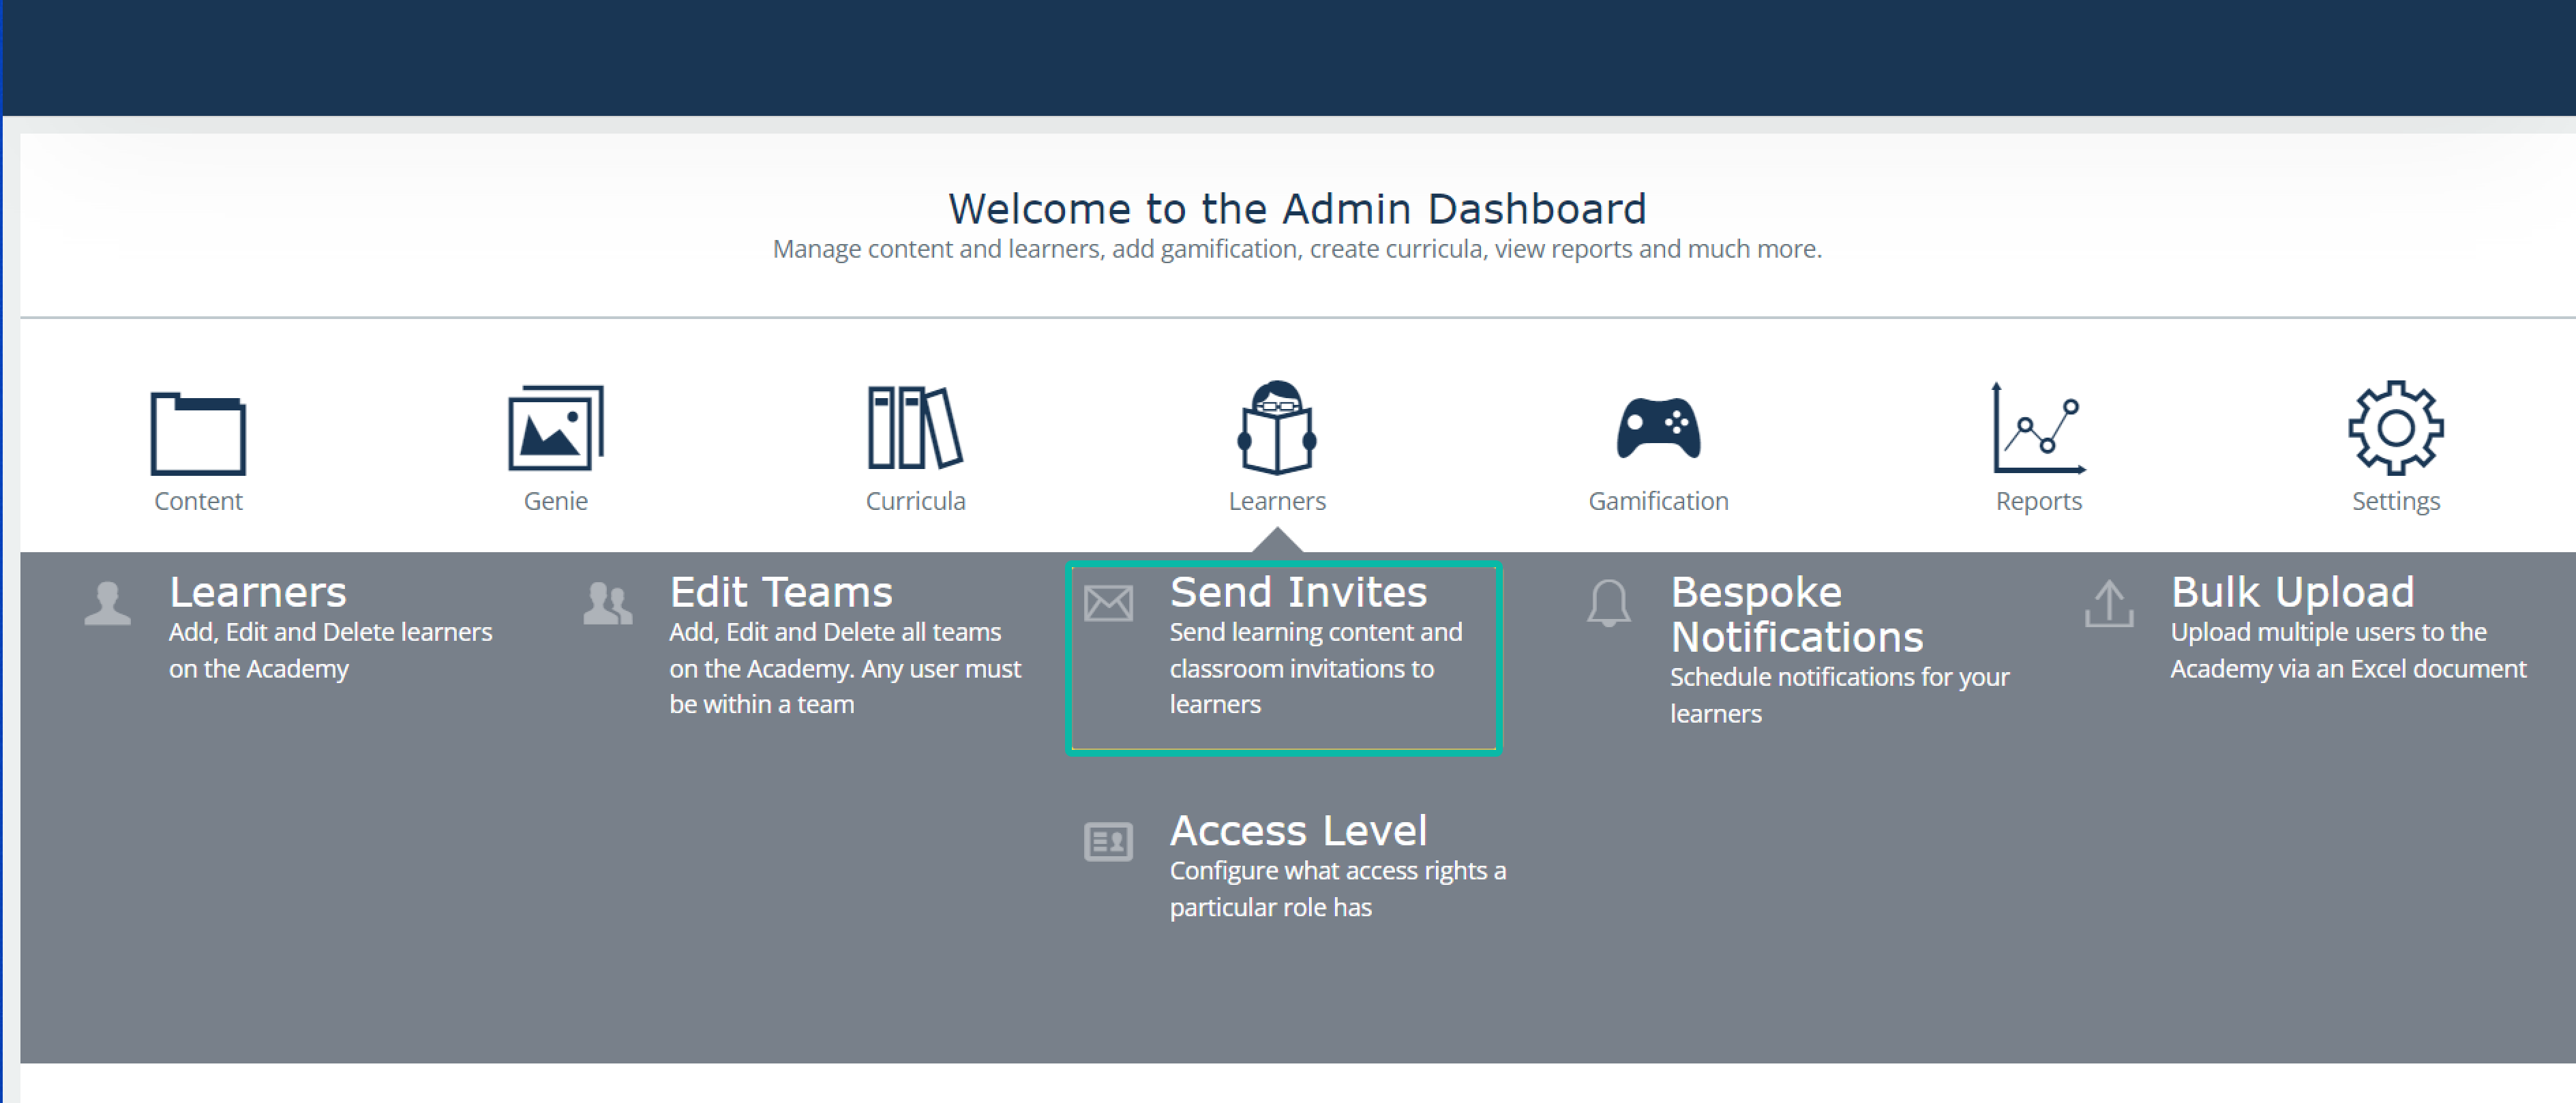
Where to find a “Send Invites” option?
This functionality is on the Admin Dashboard> Learners> Send Invites.
These are the available Invitations that Admin can complete from the Admin Dashboard, as well as the ‘Delete Invites’ section, which is described here "How To" Delete Content Invitations .

The following Content can be sent to a Learner:
Assessments, Tests, Materials, eLearning, Quests, Classrooms, Managed Enrolment, Managed Expired Event Enrolment, Curriculum, Reviews and ‘Hello’ which is a template of Welcome Email to the Academy LMS.
How to send an invite?
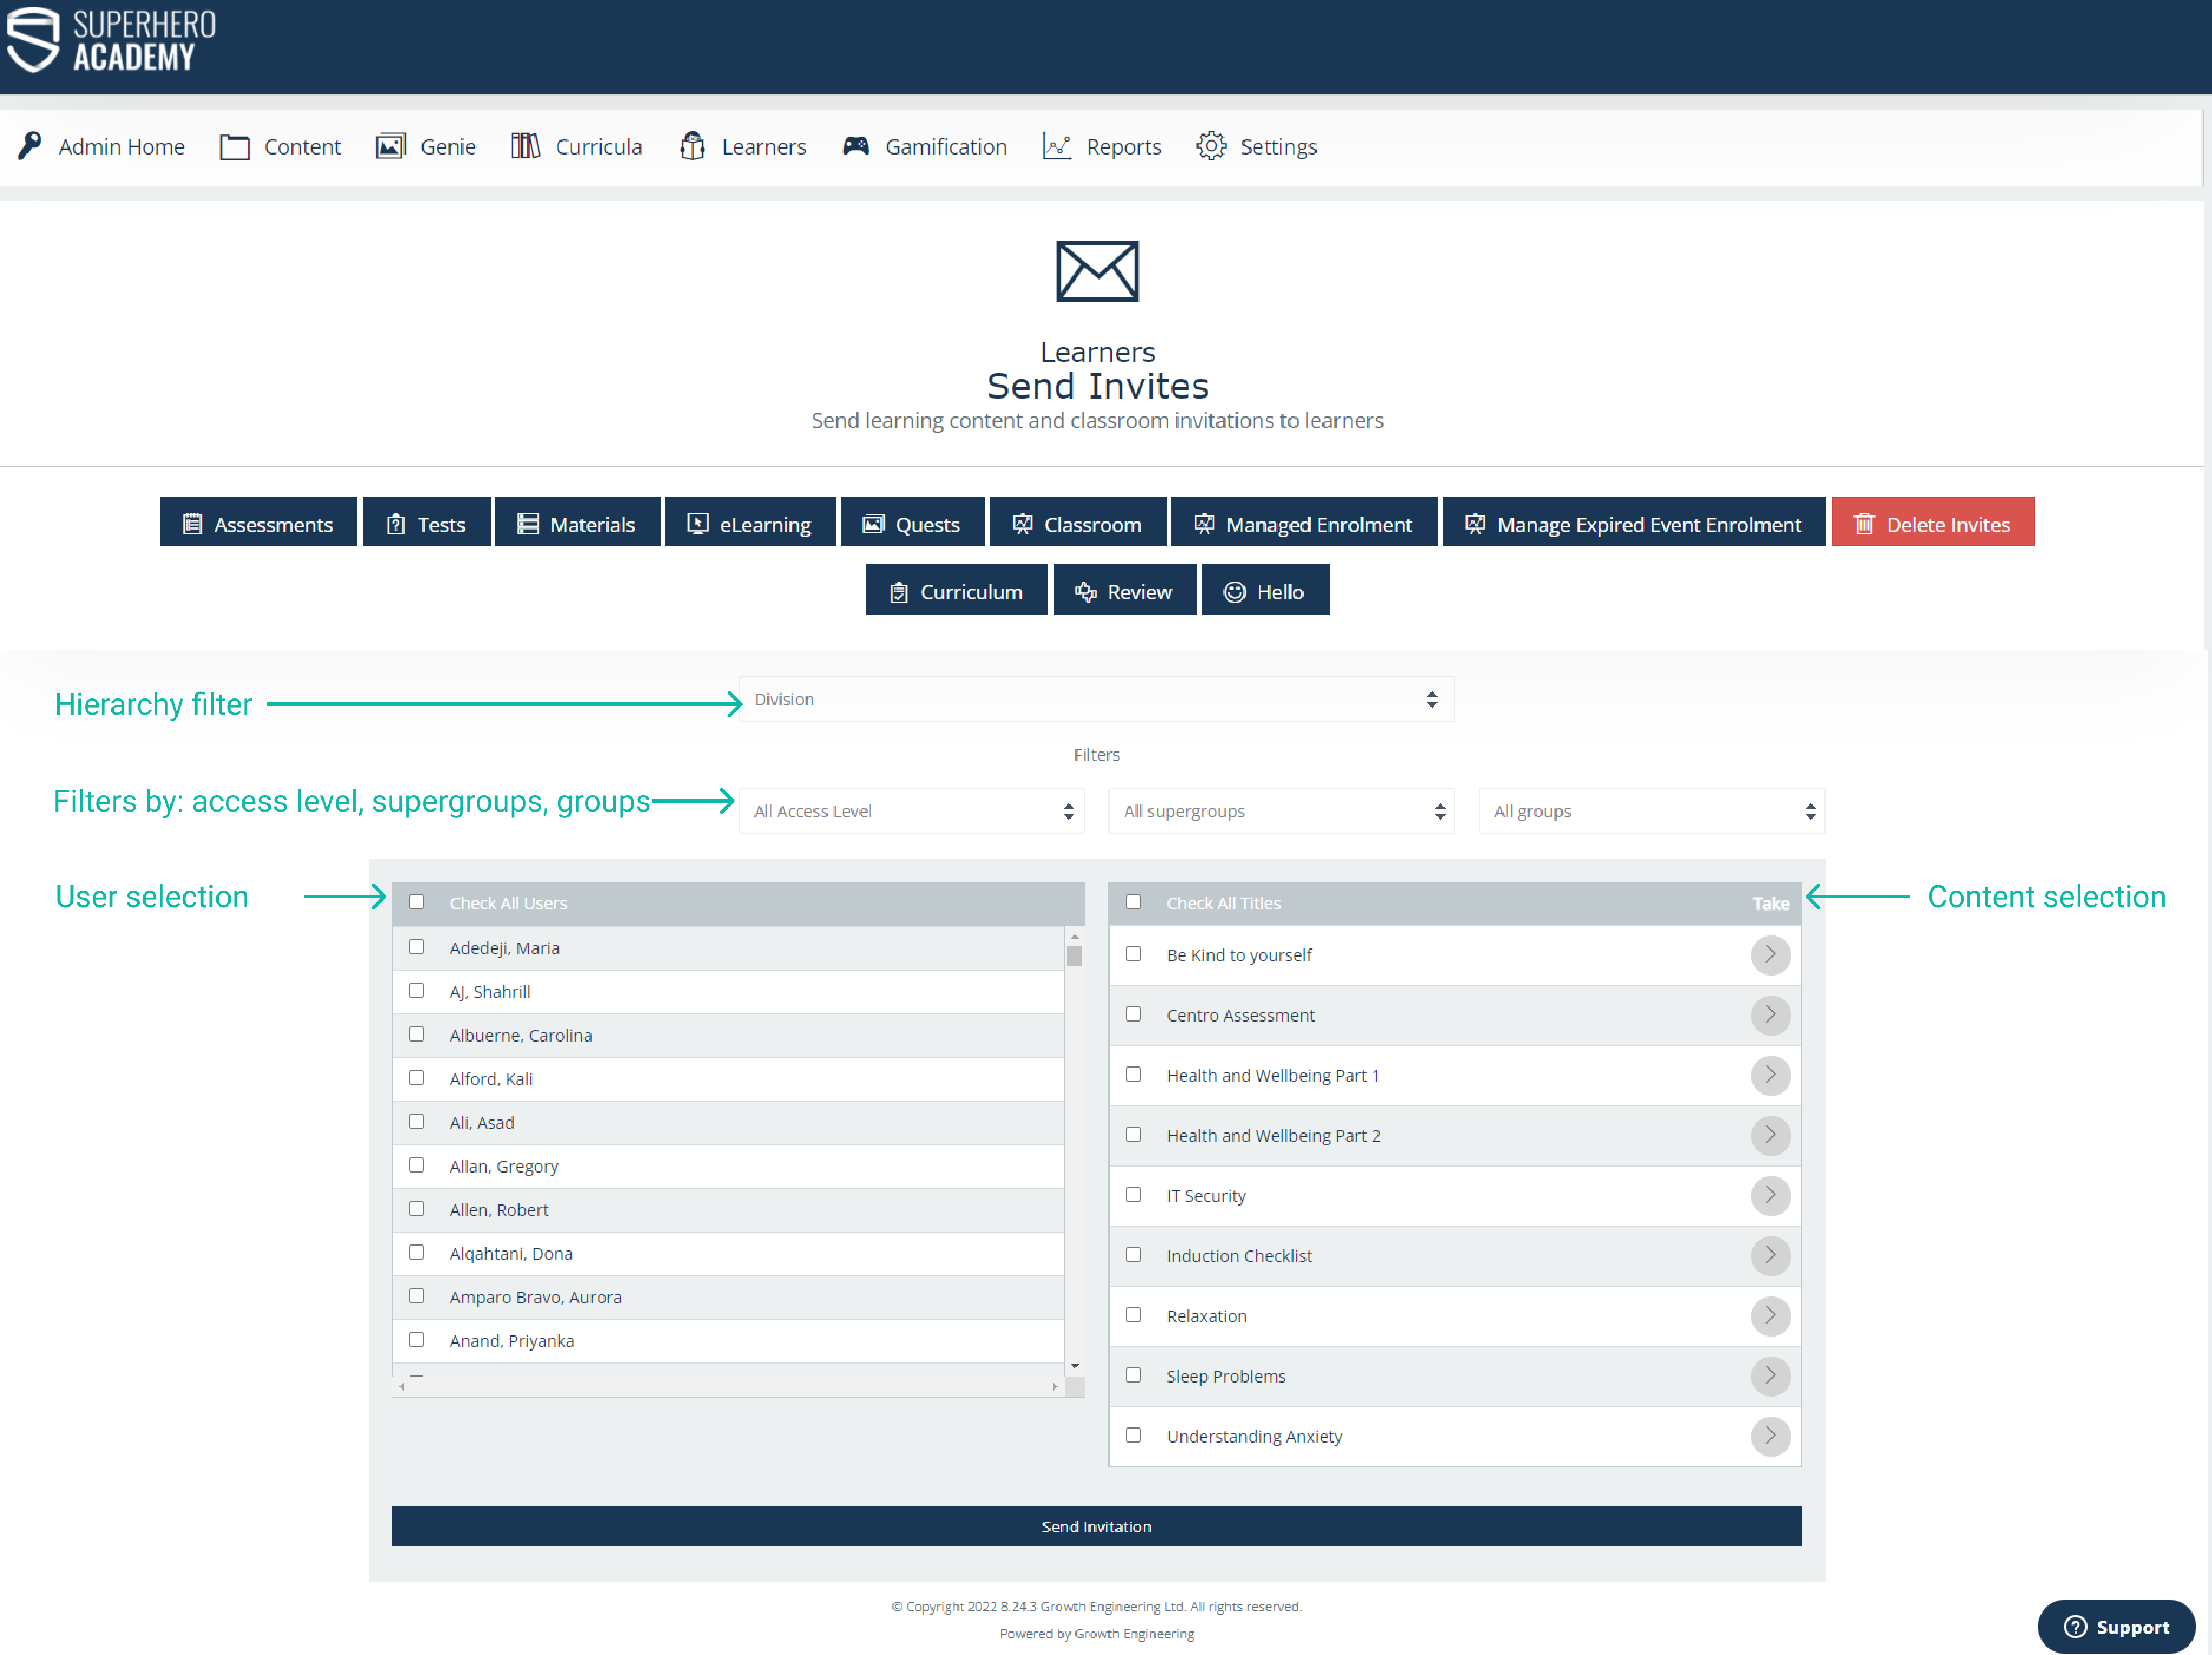
Step 1. Each tab of available Invitations has the following form for selecting necessary users and content to which they will be invited:
Note: multiple selections are allowed. Navigation between tabs on this step will cancel previous selections.
Admin can:
1) filter Users by Hierarchy, Access levels, Supergroups, and Groups
2) select either a particular User by ticking a checkbox before the User’s Name or select all Users by ticking a “Check all users” checkbox.
The Content is selected a similar way: either particular pieces of content OR all available content titles at a time.
The platform can send multiple titles of each content type at once, up to a limit of 30 Titles (or 20 for Curricula). Only one Email Notification will be sent when sending multiple titles at once, with the list of Content Titles shared in the notification, and all content appearing in the Learners’ My Things To Do.
After Admin selected necessary Users in the left-hand column and Content titles in the right-hand column, they can submit their choice by clicking on the “Send Invitation” button at the bottom of the page.
At least 1 User and 1 content must be checked in order to proceed on Step 2.
Step 2.
The images below show the review of Learners and Content chosen for the Invitations and present an opportunity to set up other options for the Invitation.

An Invite Expiry option In the calendar selection allows an Admin to set up a date when the Invitation will expire and Learner won’t be allowed to get access to the content:

Email template section allows an Admin to set up options on the Invitation email that will be sent to the Learner.
Admin can change the subject and the body of the message and also use available hashtags which are presented at the top of the text editor.
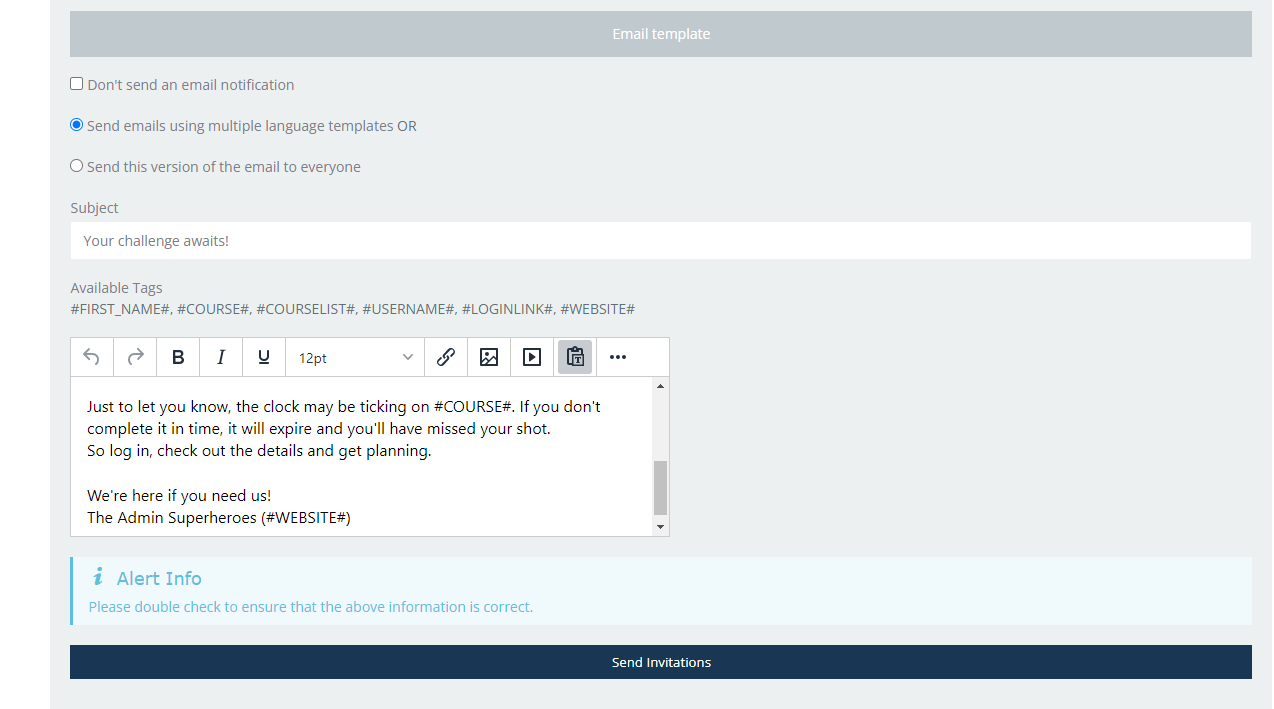
Note: if Admin selects a “Don’t send an email notification” option - email notification won’t be sent to the selected Learners but they will have selected pieces of content in their My things to do section and Library available for attendance.
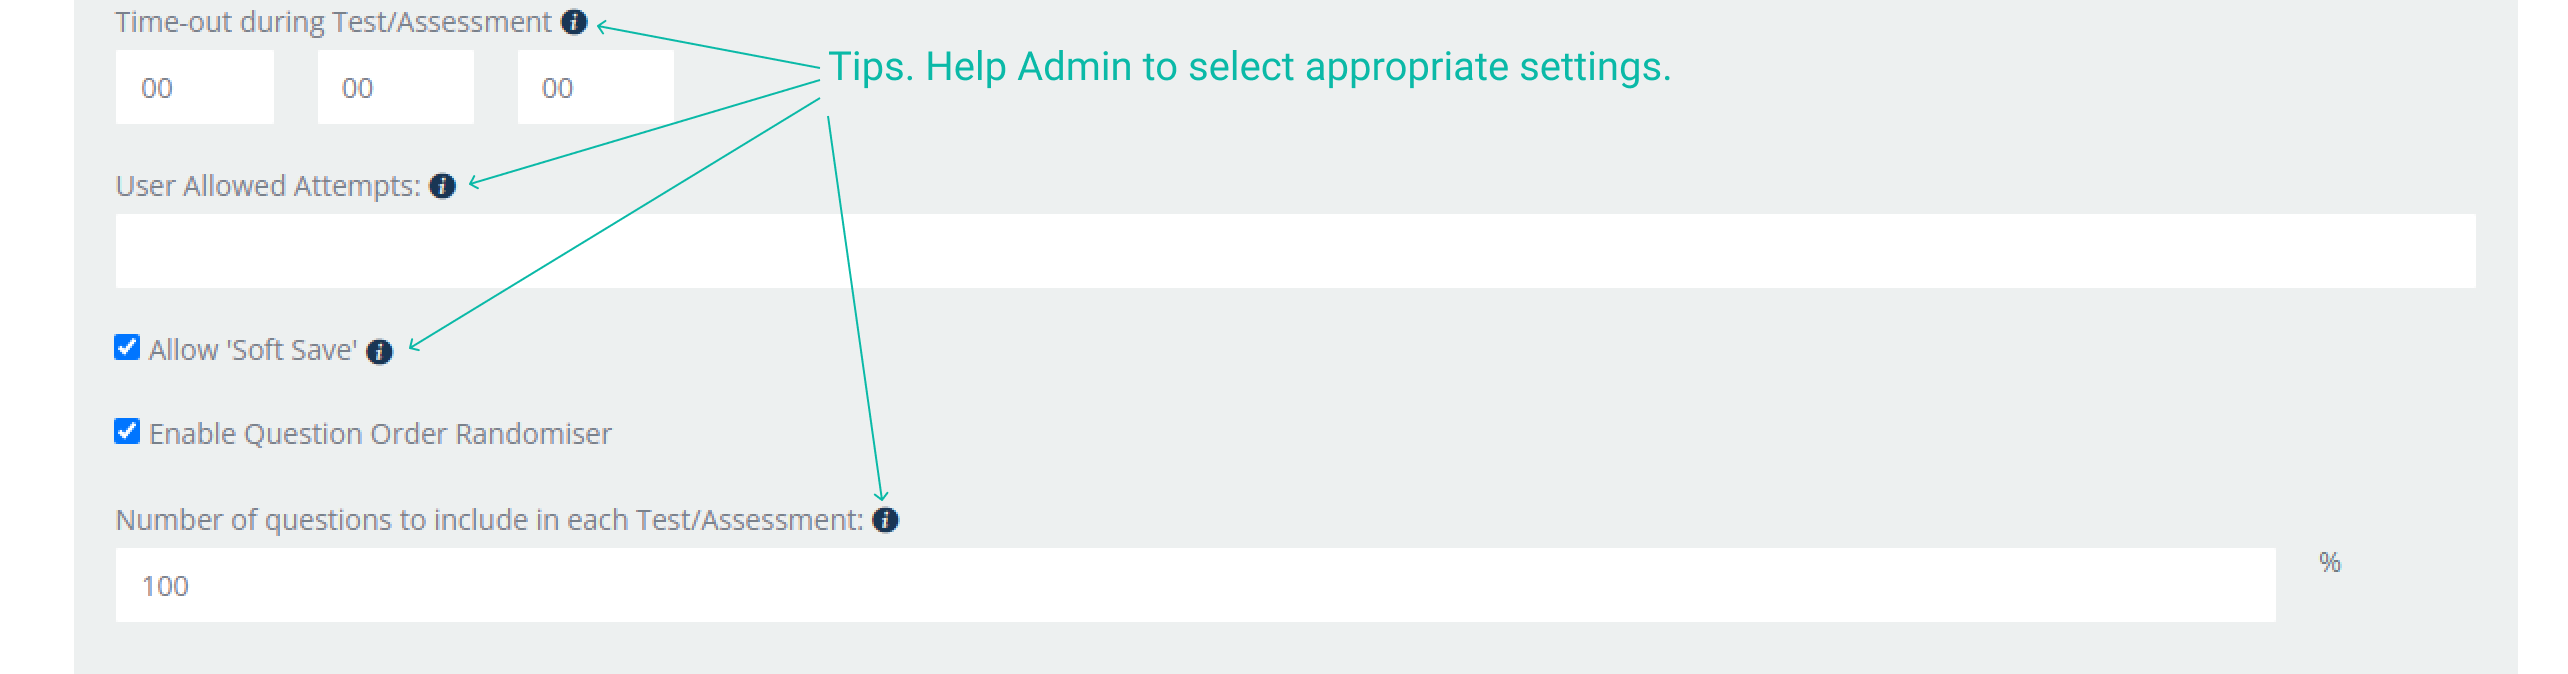
For Tests and Assessments, an Admin is allowed to set up specific options, such as Time-out during Test/Assessment, # of allowed attempts, switching On/off a ‘soft save’ mode, randomizing the order of questions and a number of questions to include in each Test/Assessment. (Note that this number is a % of the questions i.e. 50 is 50% of the questions in that test).
All these options have tips in order to help Admin make the right choice of Invitation settings.
Once Admin has filled in all needed options, they can submit sending Invites to the Learners by clicking on a “Send notifications” button at the bottom of the Step 2 page.

There you have it! Happy inviting!